• Skip to primary navigation
  • Skip to main content
  • Skip to primary sidebar
It's Raining Flour
  • Recipes
  • About
  • Personal Chef
  • Nav Social Menu

    • Facebook
    • Instagram
    • Pinterest
    • YouTube
menu icon
go to homepage
  • Recipes
  • About
  • Collaboration
  • Newsletter
    • Facebook
    • Instagram
    • Pinterest
    • YouTube
  • search icon
    Homepage link
    • Recipes
    • About
    • Collaboration
    • Newsletter
    • Facebook
    • Instagram
    • Pinterest
    • YouTube
  • ×

    Home » All Recipes » Giant Reese's Peanut Butter Cup

    Giant Reese's Peanut Butter Cup

    Published: Feb 16, 2016 · Modified: May 11, 2021 by Dalya Rubin · This post may contain affiliate links,

    Sharing is caring!

    • Facebook
    • Email
    • Print

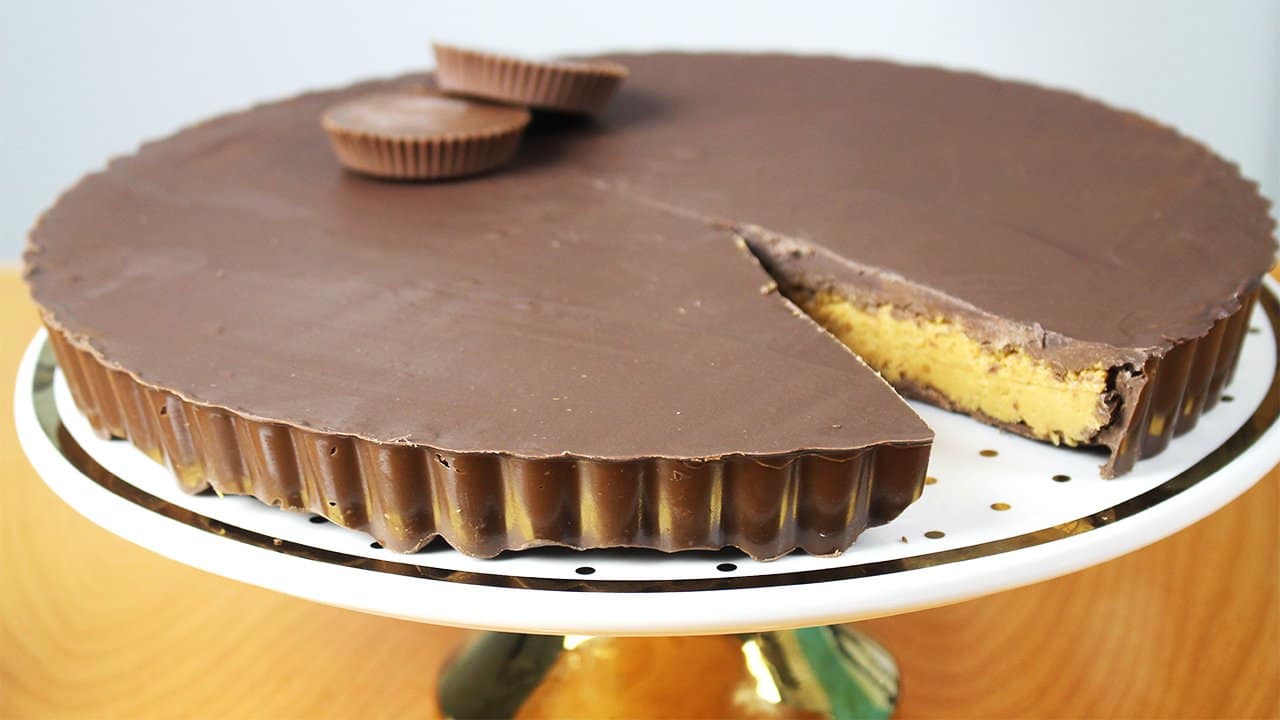
    Now you can make a humongous Reese's Peanut Butter Cup from scratch! It requires very few ingredients and is a great treat to indulge in!

    Check out the video tutorial here:https://youtu.be/iIaSsTI9PbE

    Ingredients and Tools You will need to Make the Reese's Peanut Butter Cup:

    4 cups chocolate candy melts (about three 12 ounce bags)
    2-4 tablespoons vegetable shortening
    4 tablespoons margarine or butter, melted
    8 oz peanut butter (half of a 16 oz jar)
    ¾ cup graham cracker crumbs
    2 cups confectionary sugar
    12 inch tart pan
    Offset spatula
    Parchment Paper

    To begin making the Peanut Butter Cup, line your tart pan with parchment paper. Set aside.

    In a microwave safe bowl, combine 1 ½ cups of the chocolate candy melts with 1 tablespoons vegetable shortening. Melt this on 30 second intervals, stirring in between until the chocolate is silky smooth.

    Using an offset spatula (or a knife), spread the chocolate to coat the entire tart pan (bottom and sides). Make sure the chocolate is brushed into any grooves and crevices. Refrigerate this layer for 30 minutes.

    Screen Shot 2016-02-11 at 7.37.19 PM

    Melt another ¼ cup of chocolate candy melts and use it to brush any areas on the chocolate tart that look to thin. Refrigerate for another 30 minutes.

    Meanwhile, make the filling!

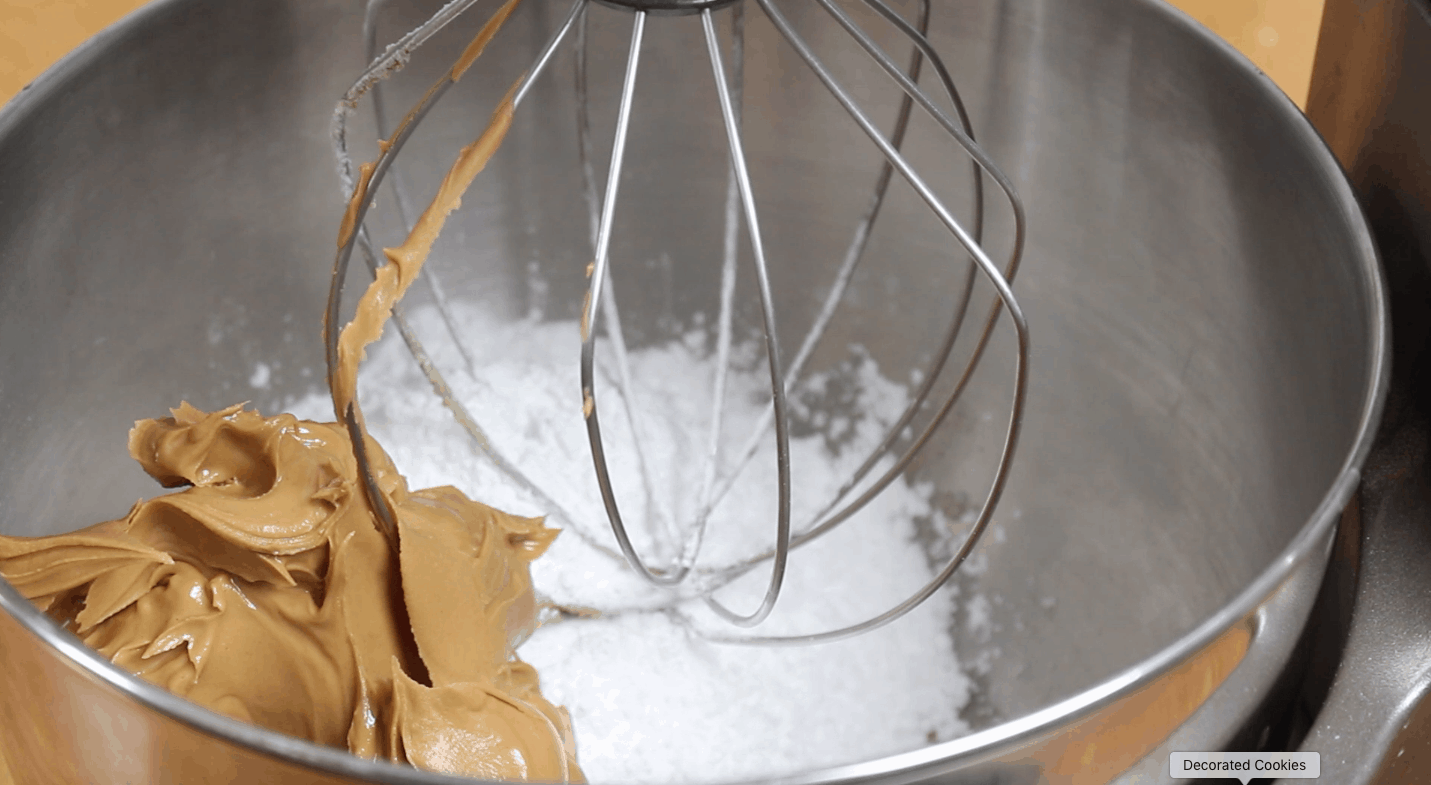
    In a bowl of an electric mixer or food processor combine the melted margarine/butter, peanut butter, graham crackers, and confectioner sugar. Mix until combined.

    Screen Shot 2016-02-11 at 7.40.19 PM
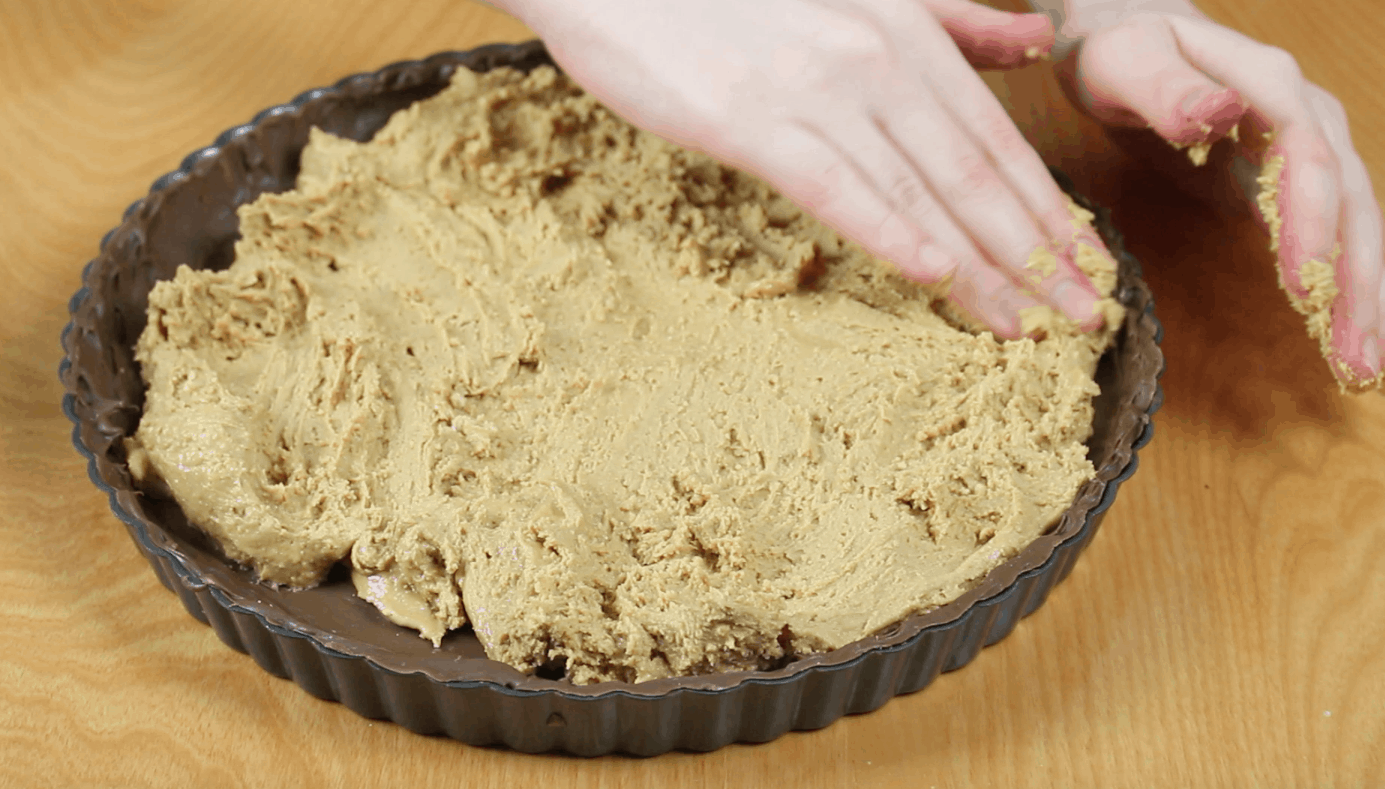
    Spoon the peanut butter filling over the chocolate tart shell and spread out with your hands. *I recommend spraying your hands with baking spray to prevent the filling from sticking to your hands.

    Screen Shot 2016-02-11 at 7.41.21 PM

    Return the tart pan to the fridge for another 30 minutes.
    After refrigerating the chocolate-peanut butter tart, melt 2 cups of chocolate candy melts with 1 ½ tablespoons of vegetable shortening.
    Pour the melted chocolate over the peanut butter layer and spread evenly using an offset spatula (or knife).
    Use a ruler to smooth the top of the tart.
    Return the Huge Chocolate Peanut Butter Cup to the fridge for at least a half hour before serving. To remove it from the tart pan push it out gently from the bottom.
    Refrigerate the tart up until 1 hour before you plan on serving it.

    hugepbcup


    Cookie Monster Cake »

    Reader Interactions

    Comments

    1. Felicia says

      December 07, 2016 at 4:57 am

      I have a question. I don't have a tart pan or know anyone that I could barrow from but I do have a cheesecake pan. Could I use that instead?

      Reply
      • Dalya Rubin says

        December 07, 2016 at 7:04 pm

        You can totally use a springform pan, if that's what you're refering to. Happy Baking!

        Reply
    2. Amy says

      December 14, 2016 at 11:02 pm

      How long does this stay fresh for?

      Reply
      • Dalya Rubin says

        December 16, 2016 at 3:31 am

        I'm so glad you asked! This can stay fresh for about 1 week in the fridge.

        Reply

    Leave a Reply Cancel reply

    Your email address will not be published. Required fields are marked *

    Recipe Rating


    This site uses Akismet to reduce spam. Learn how your comment data is processed.

    Primary Sidebar

    Hi, I'm Dalya, a trained Chef & Recipe Developer. I can't wait to teach all gluten free foodies how to cook and bake with confidence!

    More about me →

    • Instagram
    • Facebook
    • Pinterest

    Summer Recipes

    • two slices of gluten free lemon drizzle cake on a cooling rack
      Best Gluten Free Lemon Drizzle Cake
    • soy garlic chicken wings on platter with parchment paper
      Soy Garlic Chicken Wings - Sticky and Crispy
    • tuna pesto pasta in white bowl with fork
      Easy Tuna Pesto Pasta
    • Summer Fennel Salad with Melon on a white dish with hot sauce and pink background
      Summer Fennel Salad with Melon
    • strawberry spinach salad on a blue plate with pecans and avocado
      Strawberry Spinach Salad with Pecans
    • Chia Seed Pudding (gluten free & vegan)

    Popular Recipes

    • How to Measure Half an Egg
    • oat milk rice pudding in a bowl with toppings
      Oat Milk Rice Pudding
    • Gluten Free Raspberry Bars with Almond Flour
      Gluten Free Raspberry Bars with Almond Flour
    • no bake cheesecake in a bowl with offset spatula
       Cheesecake Filling for Cake (No Bake)
    • gluten free dutch baby in cast iron skillet with strawberries and blackberries
      Gluten Free Dutch Baby
    • gluten free orzo on spoon close up
      Gluten Free Orzo
    • All Recipes
    • Gluten Free Meals
    • Side Dishes
    • Meatless Meals

    Footer

    ↑ back to top

    ABOUT

    • Meet Dalya
    • Recipes
    • Resources
    • Portfolio
    • FAQs

    DISCLAIMERS

    • Privacy Policy
    • Accessibility Policy

    CONTACT

    • Contact
    • Work with Me
    • Featured

    COPYRIGHT © 2022 | It's Raining Flour LLC – All rights reserved.